![]()
![]()
|
|
|
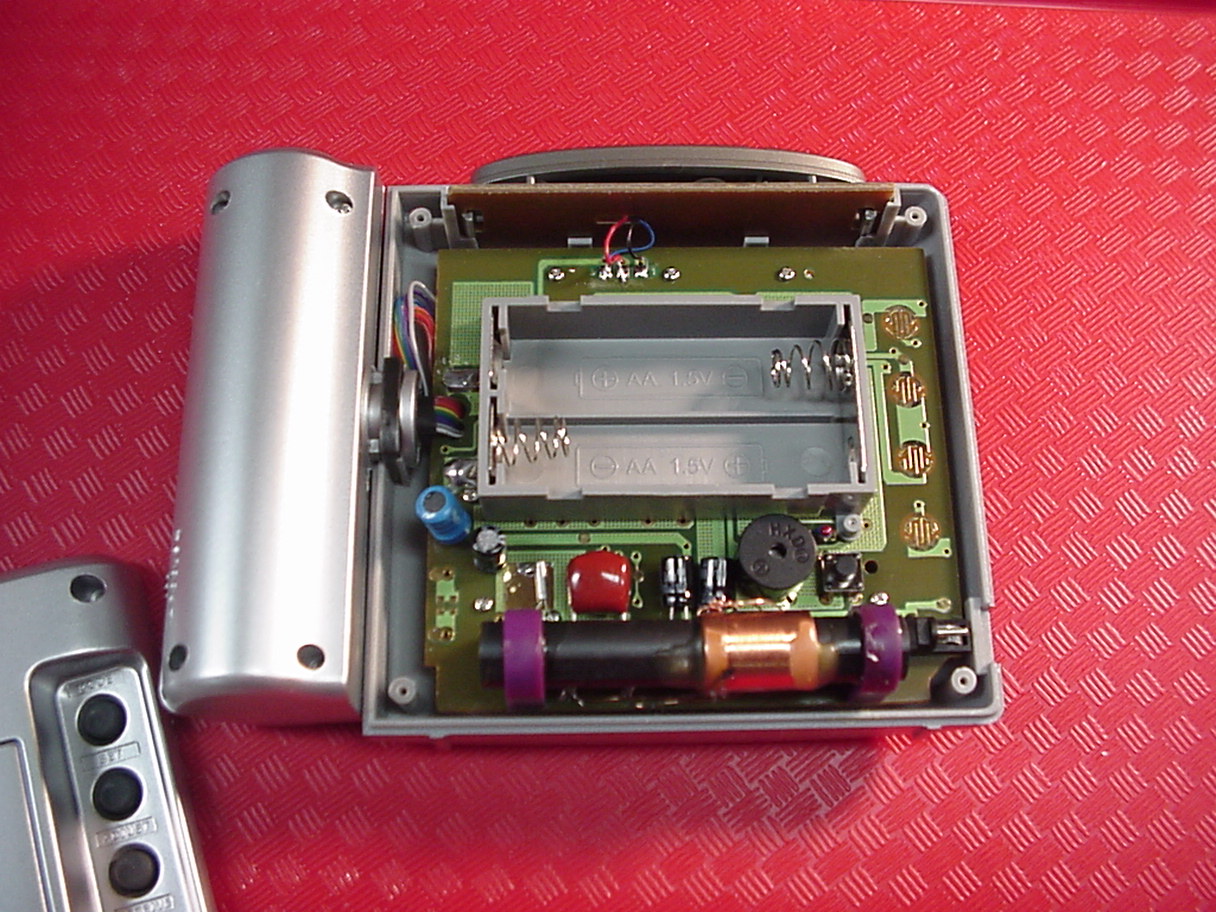
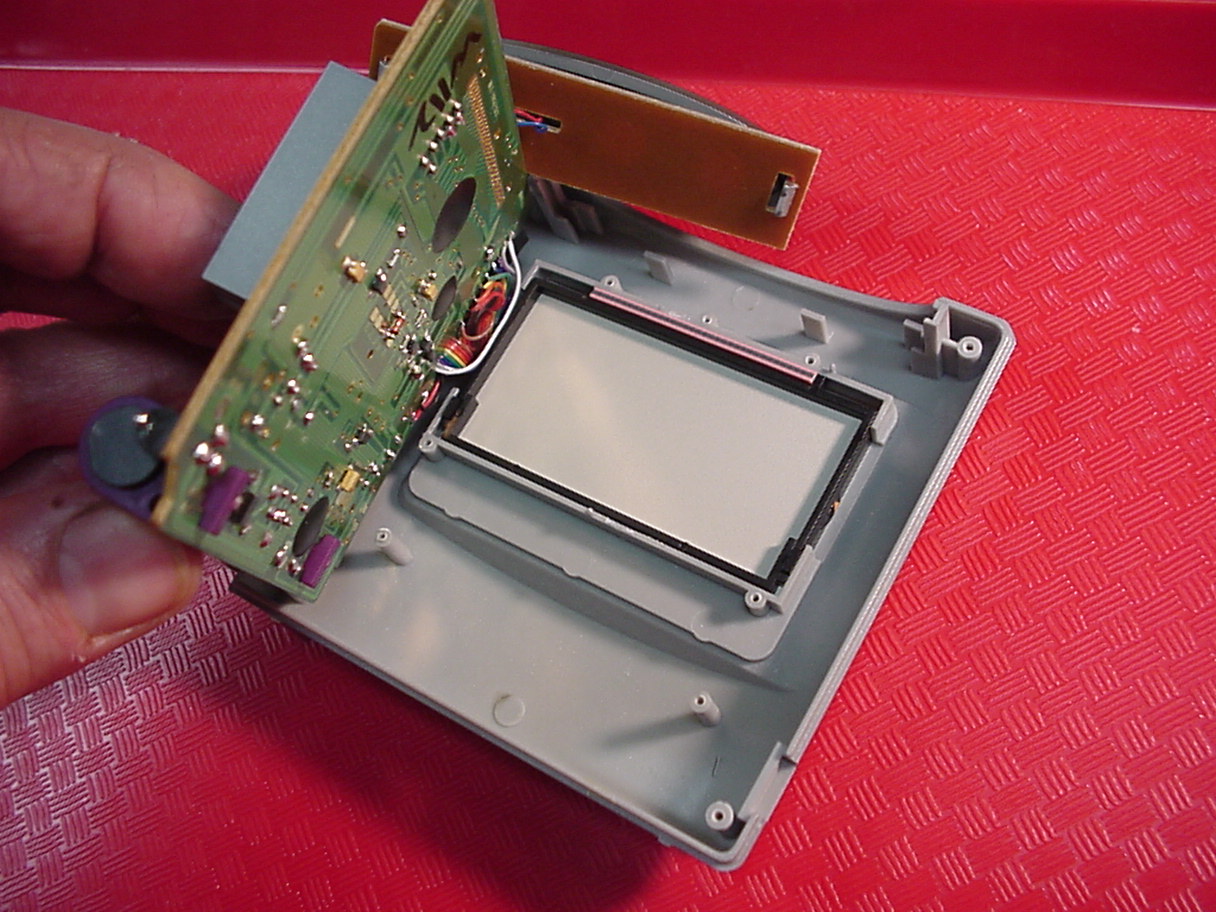
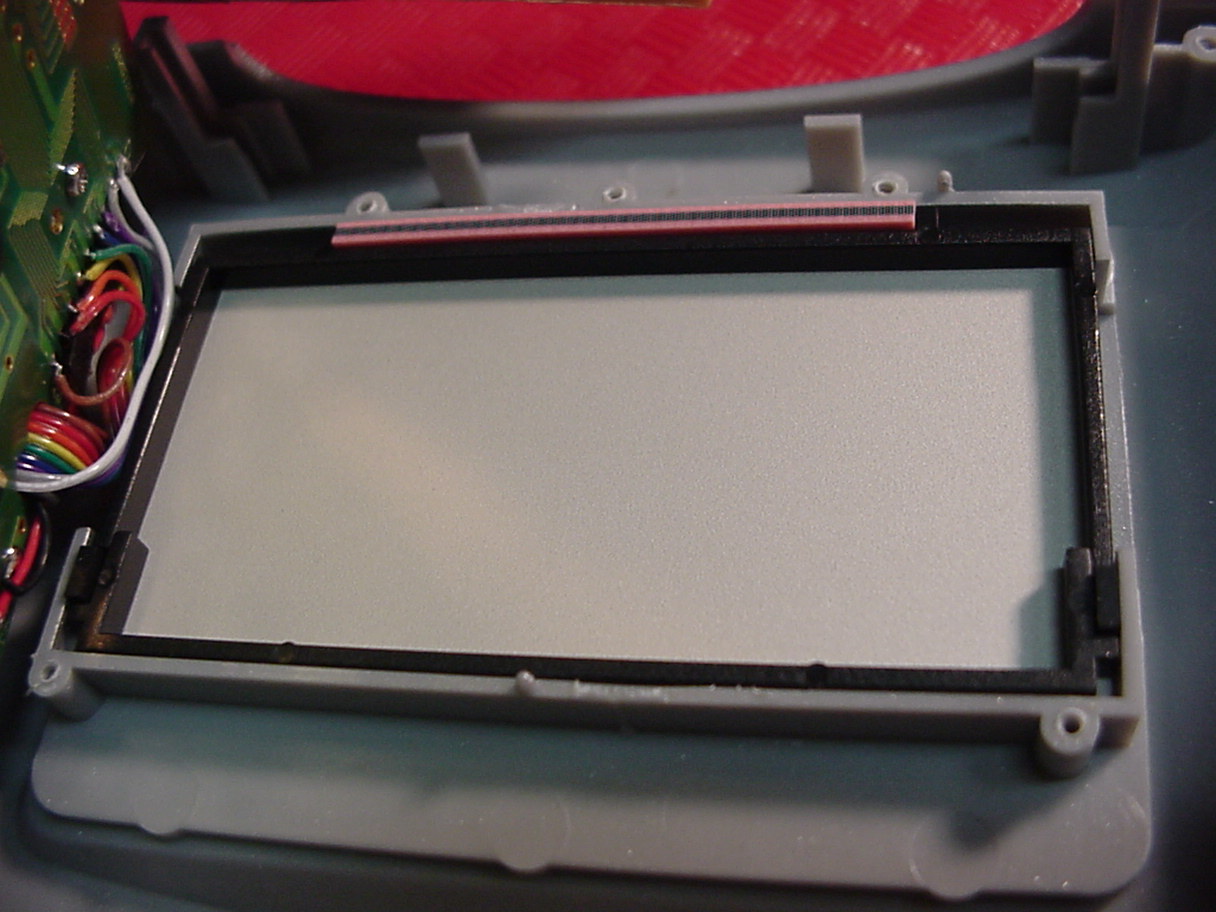
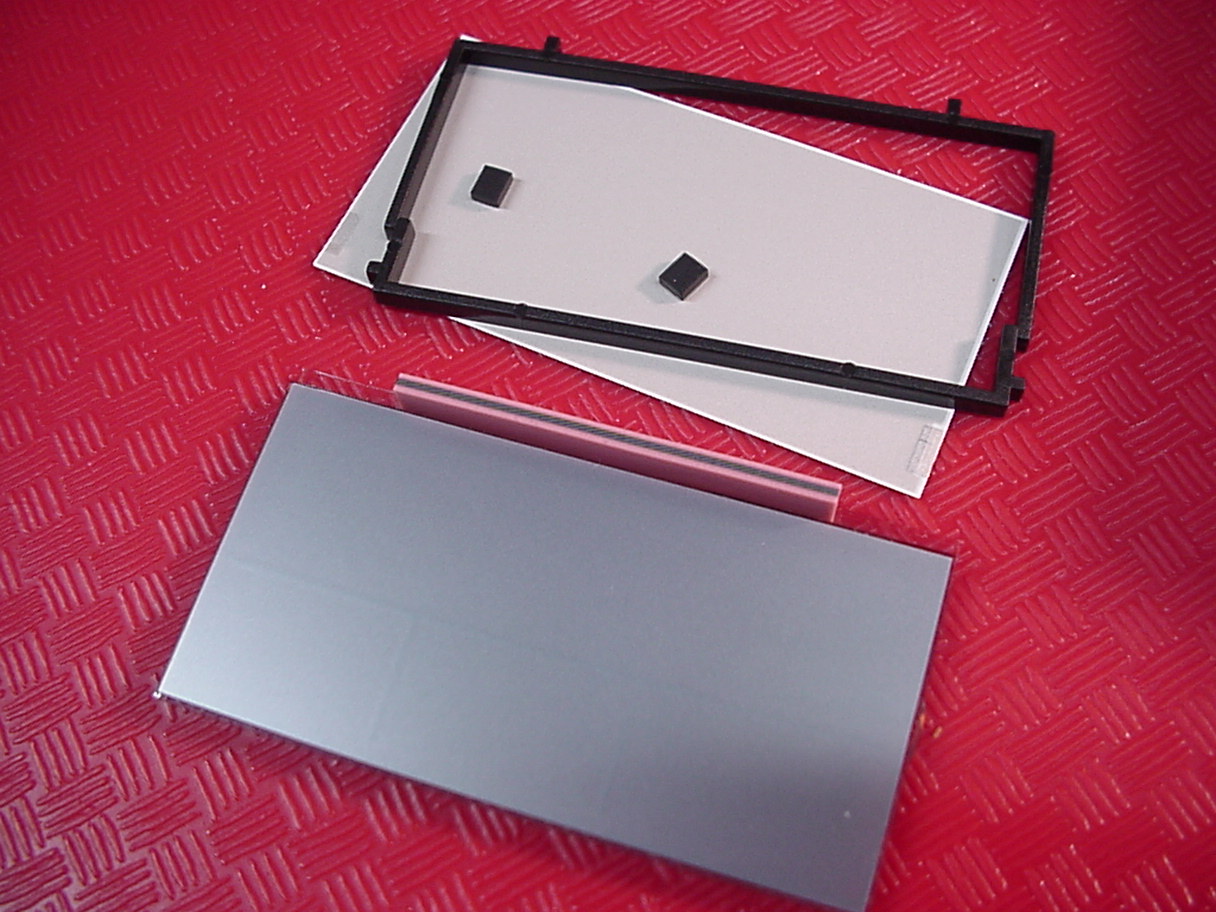
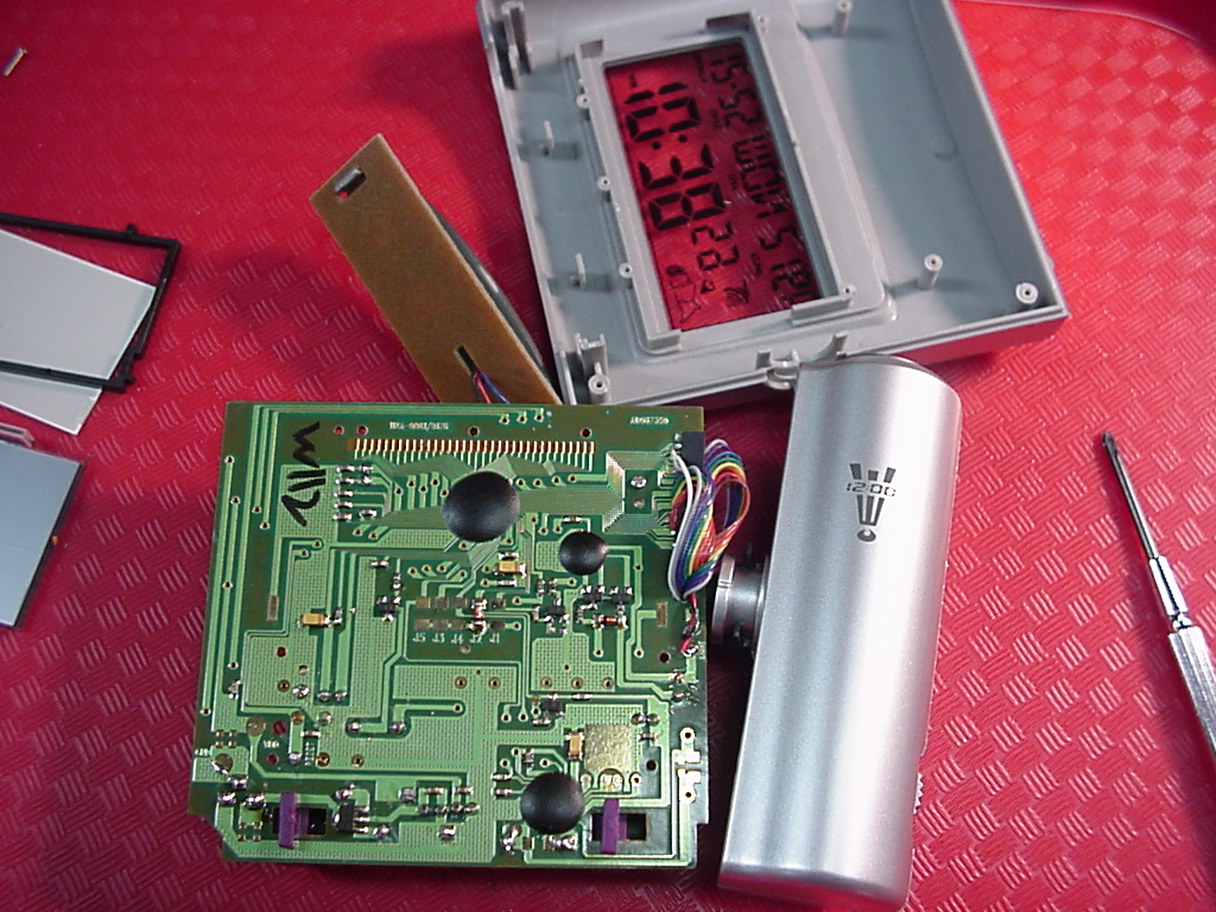
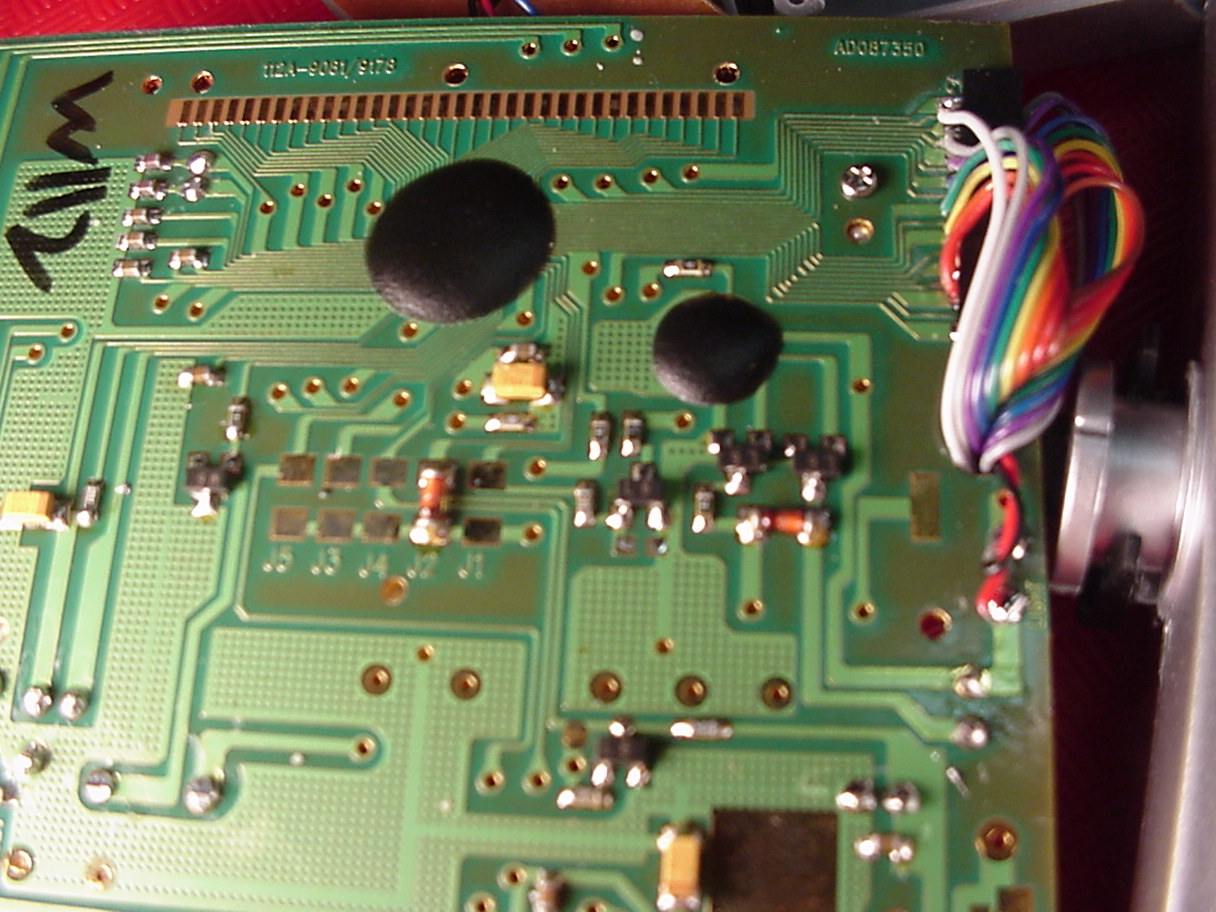
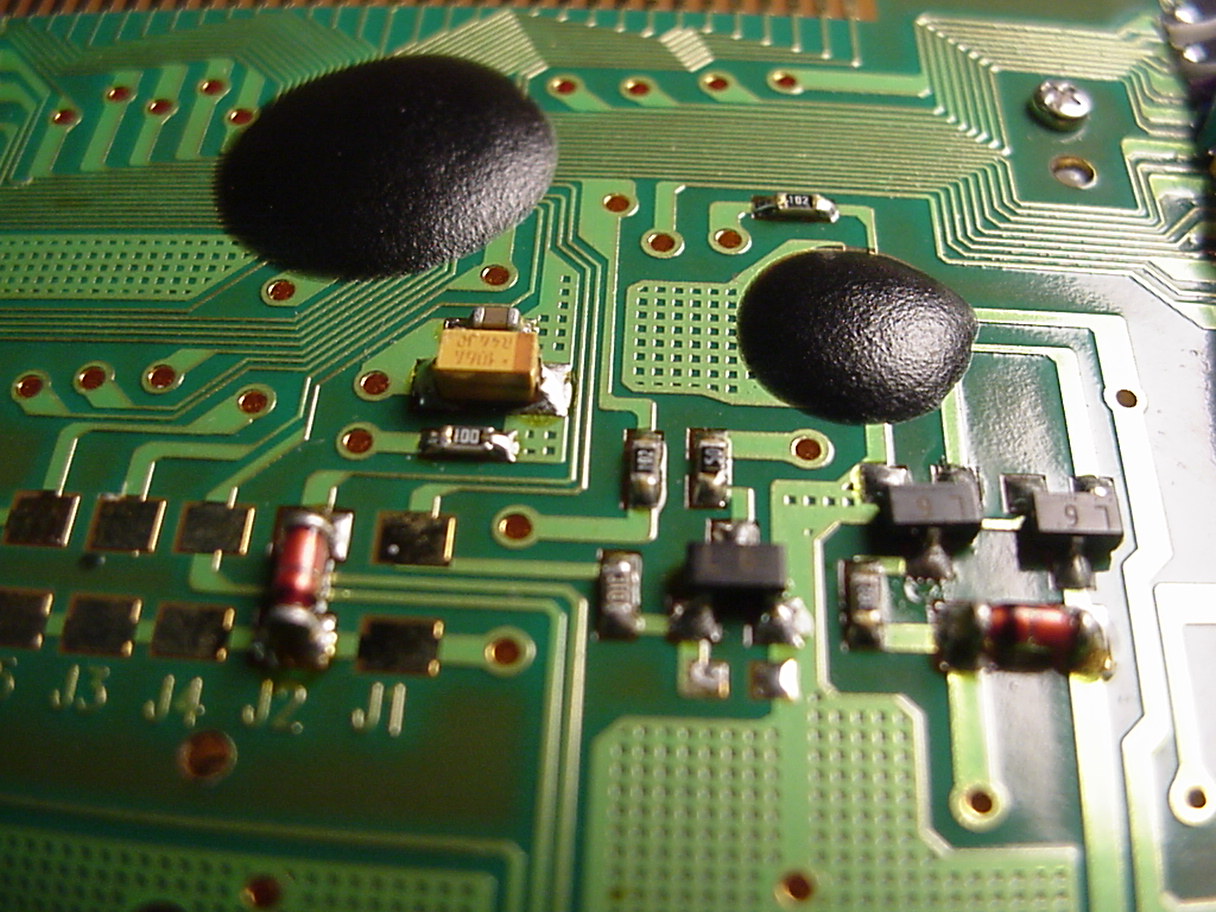
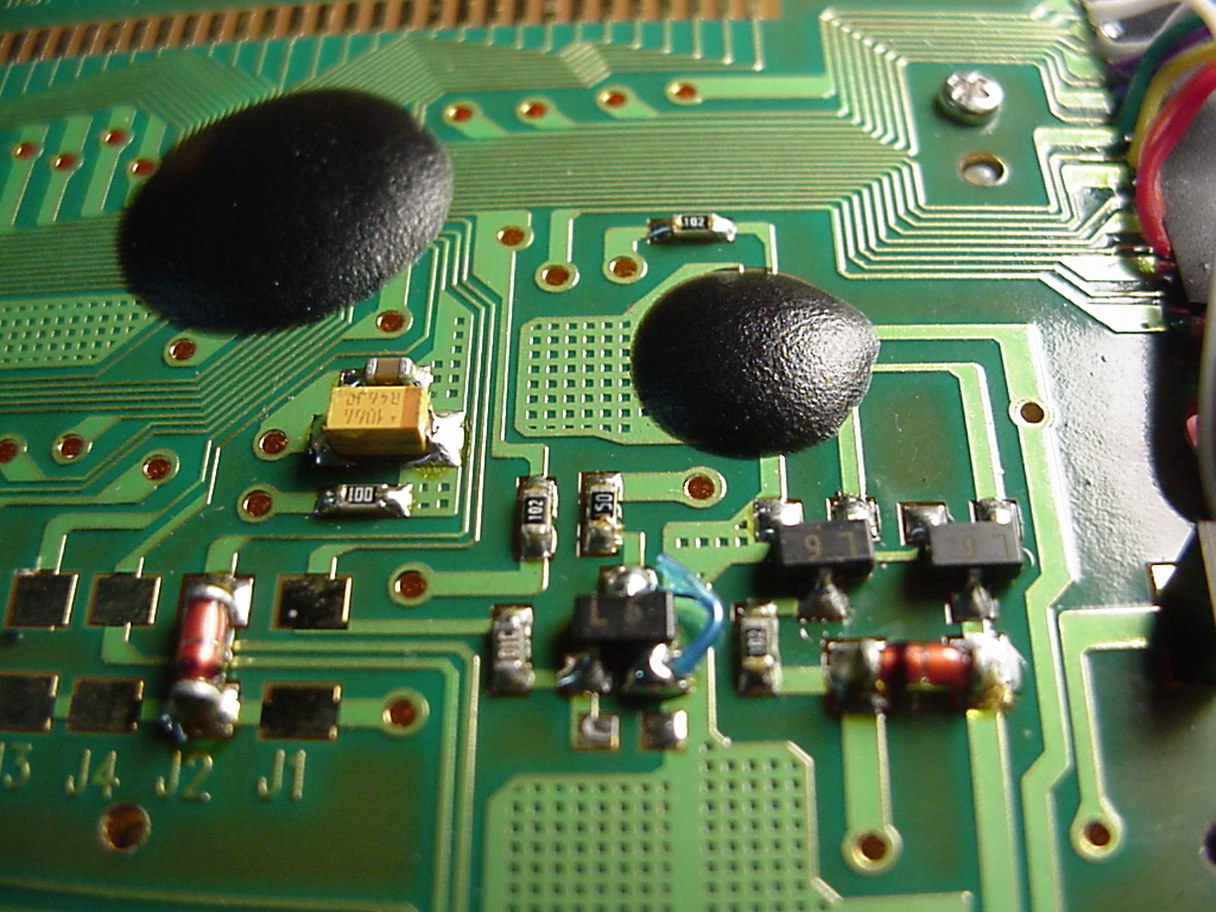
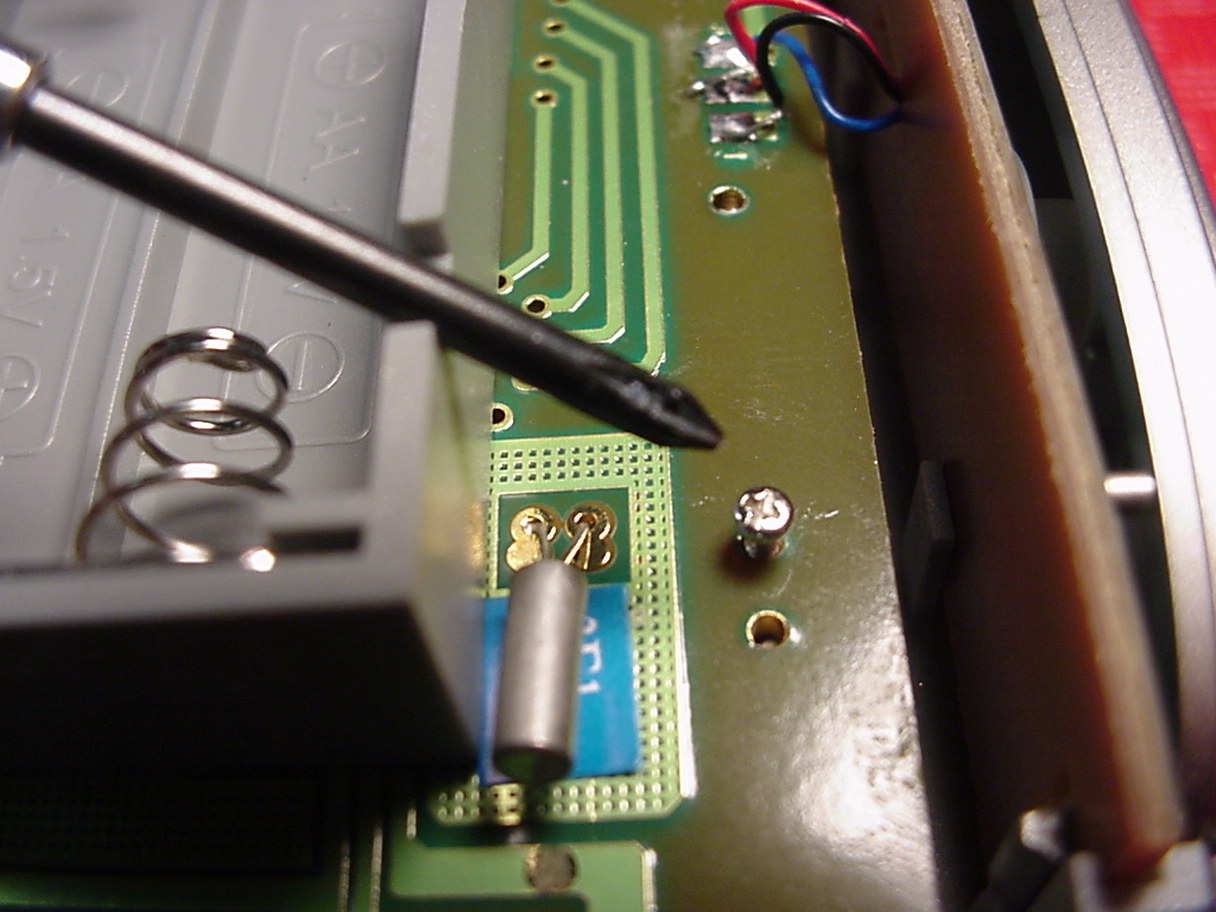
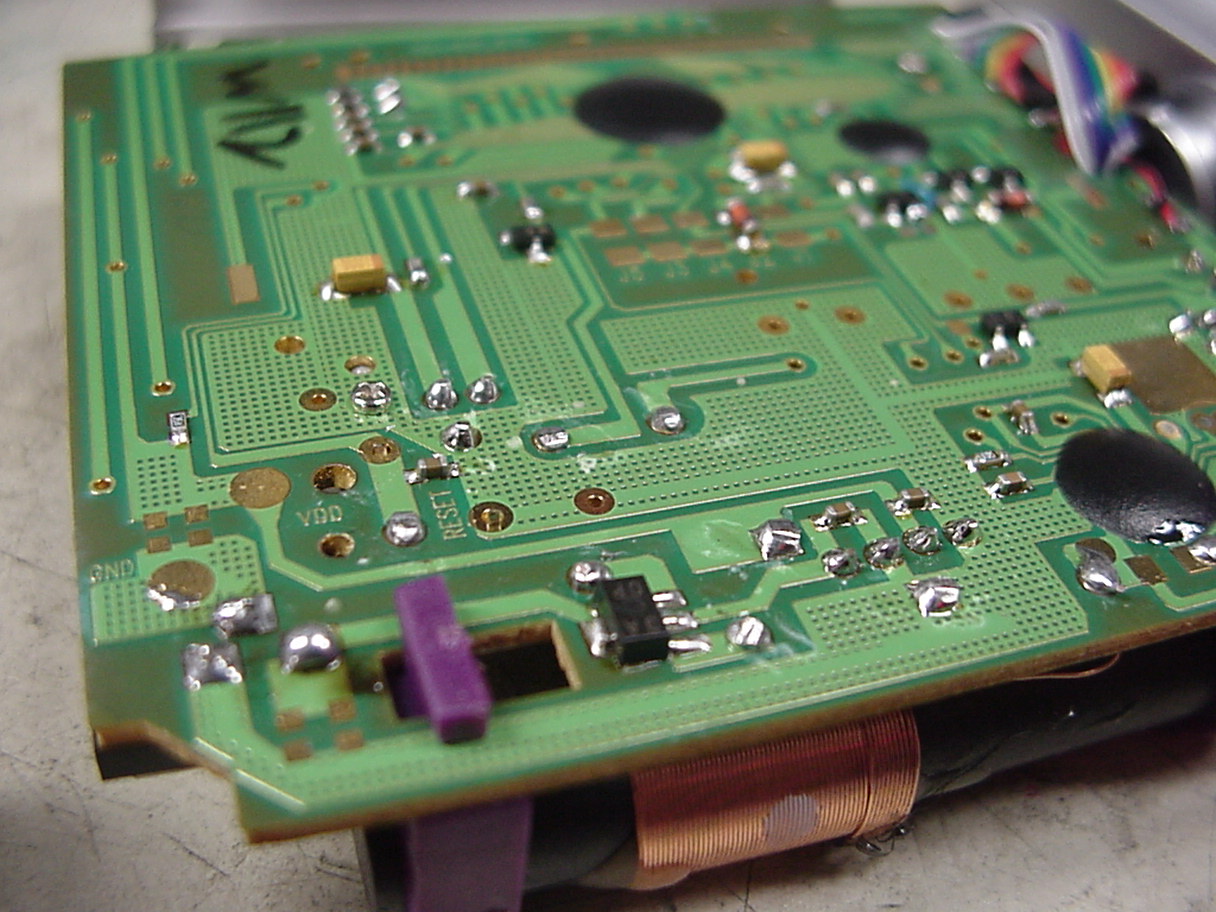
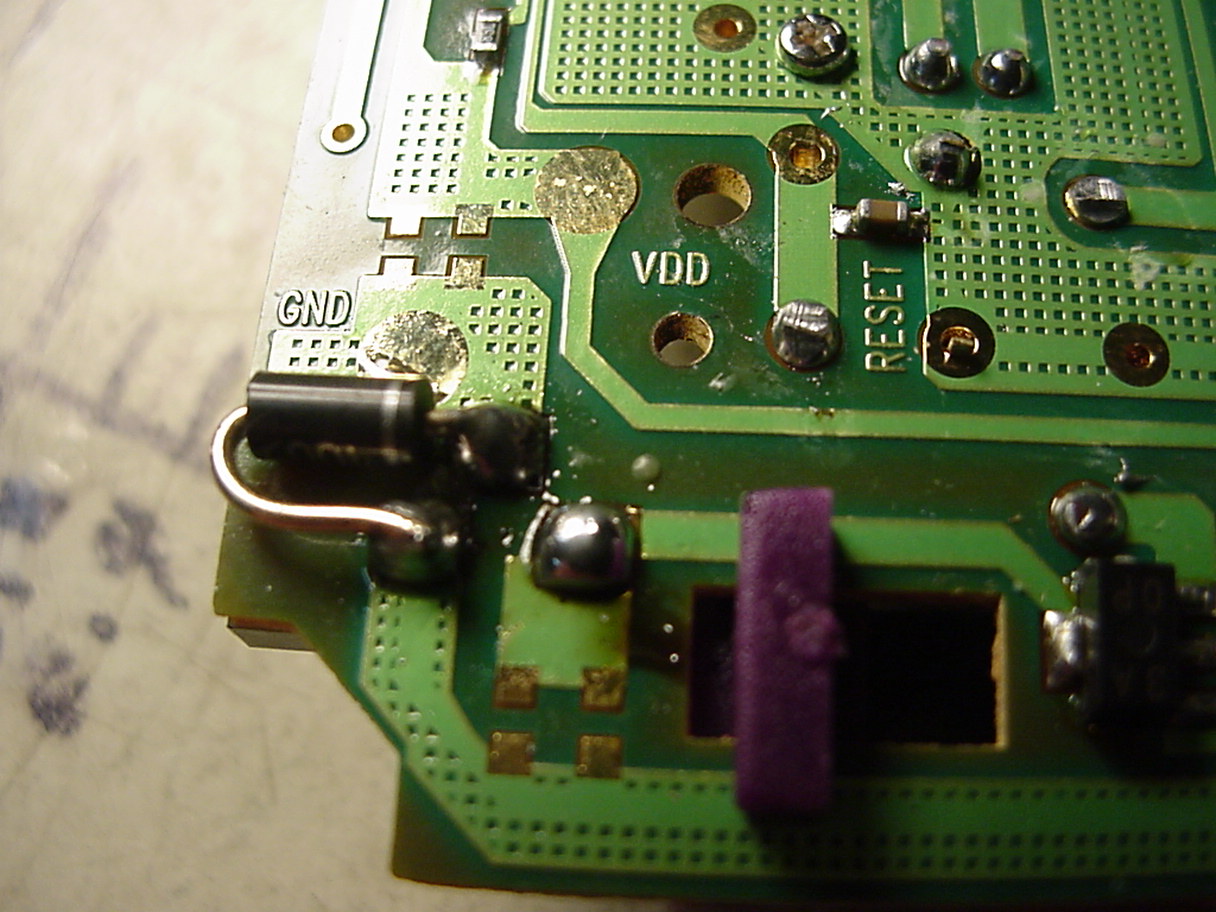
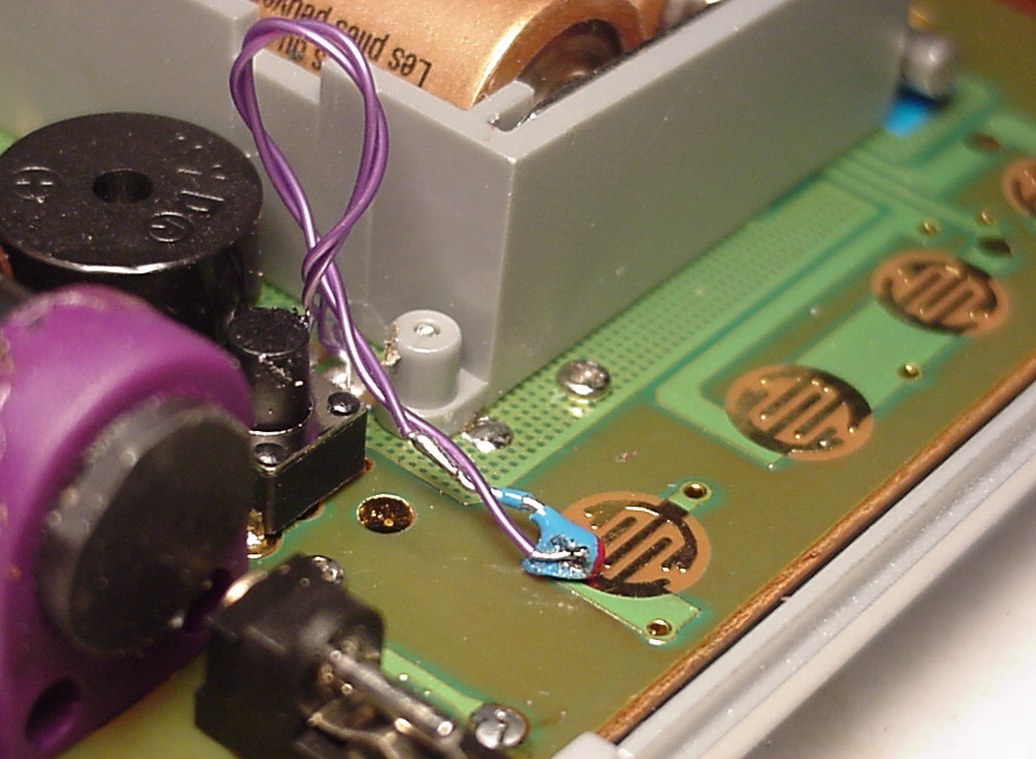
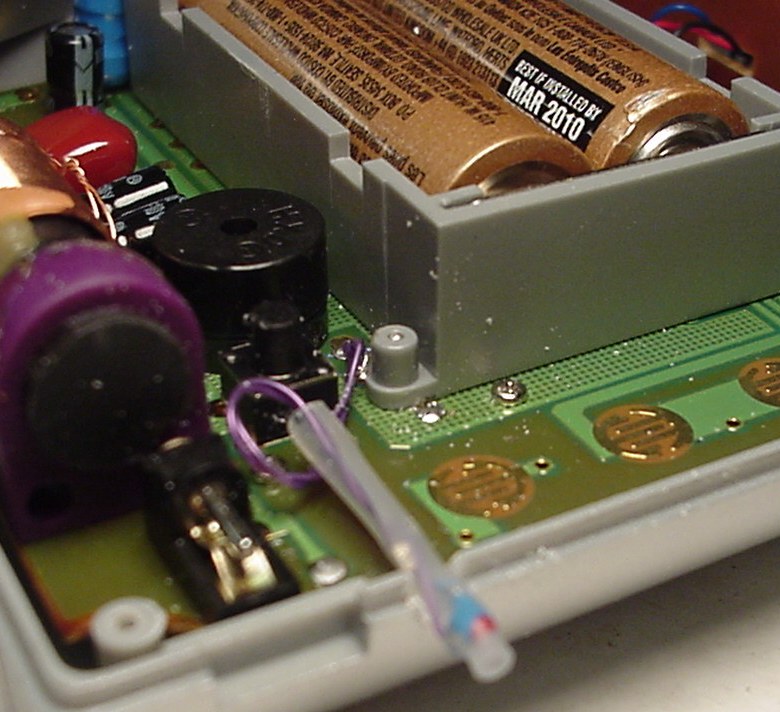
Projector Clock Modifications to allow for Continuous Display of Projected Time Clock: Centrios 6311433 LCD Alarm Projection Clock Purchased from Circuit City Website for less than $10 Background: After spending the night with the time projected on the ceiling with a borrowed projector clock, I wanted that feature. It was nice to be able to look up and see the time, without bending around for my headboard alarm clock, or putting my glasses on to see the clock on the VCR across the room. I searched the web and found what may be a close-out price. I bought 3 of them to meet the $25 minimum order for free shipping. The clocks arrived and seemed to work well. They even Auto-Set to broadcast time! The down-side is that the clock only displays for 5 seconds after a quick push, or 30 minutes after holding the button down for 3 seconds. The 30 minute mode is acknowledged with a beep. That didn't sound like what I wanted . . . I took the thing apart and found a place I could short out the control signal for the projector display. With this mod, the projector display is always on. This mode is not good for battery operation, and is meant for use with the AC adaptor that came with the clock. Buy one, modify it, and enjoy the easy way to know what time it is when you wake up in the dark. You will need a small Phillips screwdriver and a small tipped soldering iron. Give it a try, you don't have much to lose. It costs less than $15 with postage. Don't be afraid. 01 Remove 4 screws from back.JPG 02 Carefully lift off back.JPG 03 Remove 7 screws, lift carefully.JPG 04 Note position of frame, black conductors, and pink strip.JPG 05 All the pieces you should have noticed, plus EL sheet and LCD.JPG 07 Zooming in on area of interest.JPG 08 View of transistor to short out.JPG 09 Blue wire shorting transistor C-E.JPG 10 Insert all screws before tightening any screw.JPG And now for the "plastic screw" lecture . . . Screws designed for plastic are special. They are made of metal, but they are called "plastic screws" because they are specifically designed to go into plastic. They have fine threads that cut (or form) threads in the plastic the first time they are screwed into a plastic boss. By the 4th or 5th time a screw goes into the same hole, it has chewed up all the plastic in the boss and the plastic threads will strip very easily. The key to long life plastic screw insertion is to gently rotate the screw backwards, while pressing down gently and feeling (or listening) for the slight snap as the screw drops into the previously formed threads. After you have found the original path the screw made, you can turn the screw in the normal direction. Learn this well and teach it to your children . . . . . . and another thing . . . When you plug and unplug the AC power adapter, the battery is cut out and the clock resets and needs to "time sync" again. The batteries are not backups for momentary power outage. This is stupid! I found a place where I could put a diode to make the battery work as we would expect. Now insertion or withdrawal of the power connector doesn't reset the clock. It will also work through power outages (while using the batteries) and continue working when the power comes back on (if the batteries haven't died). Use any old silicon diode, observing the polarity band. I used a 1N4005, but I could have used a 1n4148 or 1N914, or . . .
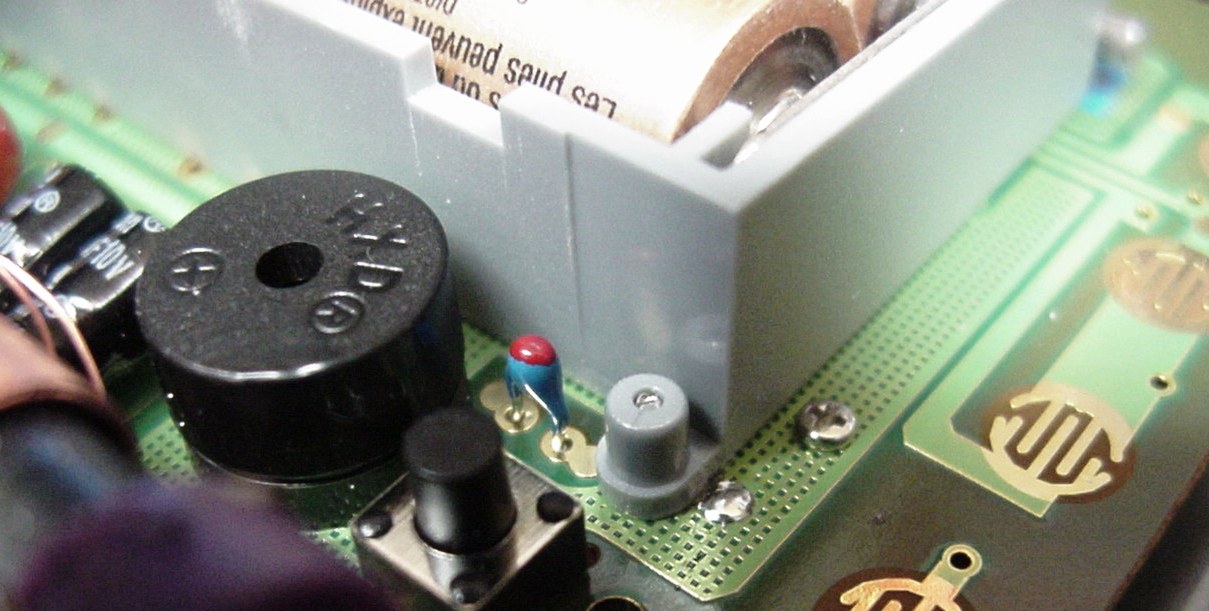
. . . and then I replaced the lens with one that was slightly more powerful so I could get a bigger display with the clock on the top of my headboard. Now I can see it with my glasses off. . . . and one more mod . . . This clock was designed for only occasional use of the projector function. With the LED drive hacked to run continuously, there is a side effect that finally bothered me enough to perform another modification. The "constant on projector" raises the temperature in my system by about 8 to 10 degrees (Fahrenheit). At first this was not an issue, since I was interested in time. After a while, this temperature display error bothered me enough to open the system again. Here is information about that modification: Locate the temperature sense thermistor.JPG My thermistor was blue with a red dot. Your's may be different. Carefully remove the thermistor. I broke my thermistor. I overheated one of the leads while heating the solder joint an pulling. The epoxy case cracked and the lead came off. I soldered a wire onto the place where the lead had attached and the thermistor seemed to work. If it had been broken, I would have put some black tape over the temperature display LED to avoid anything that would have been displayed. Add extension wires to the thermistor.JPG Use wires that will be long enough for the thermistor to be mounted outside the plastic case. File a notch in the plastic case.JPG I put a piece of heat-shrink tubing over the thermistor and wires to make my mod little stronger. Re-assemble and enjoy your "perfect" modifications.
|
|
|